July 15, 2011

Premier of Harry Potter and the Deathly Hallows Part 2

Fred and George Weasley
 Harry Potter and the Deathly Hallows Part 2 was the best movie premier I have ever been to.  Not only did the final movie live up to its potential, the whole experience was something I will remember for a very long time.  Its not often that I use the word 'epic' to describe something but that is what the movie premier was, epic.  Let me walk you through my evening and explain why.

As soon as work was over at 5 pm I went home and finished putting together Brandy's and my Gryffindor lion hats to wear with our tees.  This took me until about 7:30.  Brandy came over to my house just as I was finishing.  We were planning to head to the movies about 9 to get our seats reserved for the 12:01 showing but we had nothing better to do so we walked about 2 miles through Corvallis to get to the theater.  It took us only a half hour and thats with our detour of getting some snacks in the grocery store.

 This is what the line looked like at 8pm for Harry Potter.  The movie didn't start until 12am, and there is already a huge line 4 hours before showtime.  Luckily we had early seating so we didn't have to wait in line with everyone.  We were able to sit in our seats for 4 hours.  Yay!


 Phil, Brandy and Rachel all dressed up and waiting for the movie to start.  We were handed special Harry Potter addition 3-D glasses to watch the movie.


 To Pass the time we played some Hang Man, Harry Potter addition. We weren't very good at this game.  It didn't last long.


 Rachel and I took a break and went to find free posters in the lobby.  They were sold out so we settled on photos with Harry Potter instead.


The best part of the whole night was when two people who didn't know each other that came dressed as Harry Potter and Lord Voldermort gave the audience an impromptu show using spells from the books and jumping over furniture and throwing wands about.  They were hysterical.  I was laughing so hard I had tears in my eyes.  I was amazed at how quick they could think on the spot.  It was like watching a battle between wizards on the movie.


 After the movie we were all full of excitement and tears.  George and I took a moment to take a moment to take a photo with our little brother, Ron.


Here are the backs of our shirts with the F and G in the middle of the lion.


 Me, Rachel and Brandy.  Rachel was dressed in an elaborate owl costume she made out of felt.


 About half of the Schmidt's staff was up until 2:30 am watching Harry Potter.  Unfortunately we all had to work in the morning.  We were all hoping for a slow day and lots of coffee.  We spent most of the day going over plot lines and talking about the whole experience.

As much as I am sad to see the final movie.  It was a wonderful journey reading all the books and viewing all the movies.  Thank you J.K. Rowling for inspiring me with all your imagination. 

July 13, 2011

Bacon and Apple Breakfast Burritos

Today I made some delicious and easy breakfast burritos using bacon and apples as the main ingredients.  They were very tasty.  The salt from the bacon really complimented the apple's sweetness.

I used:
  • 5 strips organic bacon
  • 8 eggs
  • 3 slices of cheese diced
  • 1 apple diced
  • 1 small scallion diced
  • tortillas
Cook bacon on grill or on stove.  While that is going saute scallion for 5-8 mins with small amount of water in a large pot.  Take pot off heat and mix in eggs, diced cheese and diced apple.  Put back on burner on medium heat until egg is fully cooked.  Prepare tortilla and add 1-2 strips bacon and a spoonful of egg mixture.  Fold tortilla and enjoy.

 I really like using apples in my cooking these days, I've been adding it to my grilled cheese and now to my burritos.  I really liked this dish and it was easy to make.  It took less than 20 min.

July 12, 2011

Screen Printed Harry Potter T-Shirts


This past week and a half I have been busy making my costume to wear to the Harry Potter premier this Thursday night.  For the movie I am going to dress up as Fred Weasley and my friend Brandy is going as Fred's twin brother George.  This seemed fitting since Brandy and I in real life are always getting mistaken for one another.  We are the same height and hair color so I can see why a lot of people think we are sisters.  For our costumes we made matching Quidditch t-shirts with lions on the back that have the initials F and G written inside the lion.  It was a blast to make the shirts and they turned out great.  Here are the steps to make your own screen printed tee.

Step 1:  Gather your supplies
I found all of my supplies at Jo-Ann's fabric store.
  • t-shirts
  • embroidery hoops
  • shear fabric (not tulle)
  • modge podge
  • paint brushes
  • putty knife
  • sharpie
  • printed design of your project
  • fabric paint
  • Iron
  • tape
Supplies for D.I.Y screen printing

Step 2:

Get your shear fabric and cut out a piece large enough to fit in your embroidery hoop. Pull fabric tight while screwing in the bolt that tightens the hoop.  When you are buying your fabric choose one that is closely weaved together.  This will come in handy when you are modge podging your fabric in another step.  This is why I suggest not buying tulle.


This is what your fabric should look like in your embroidery hoop
 Step 3:

Tape the edges of your hoop and fabric down with masking tape.  This will keep your fabric from slipping down when you start putting modge podge on your fabric.  You may need to cut any extra fabric off to tape it down easier.

Tape the fabric to the hoop
Step 4:
Choose your design.  You can free hand your design or find something online and print it out.  I decided not to free hand mine and printed this design off line for the front of my shirt.  I used photoshop to design my lettering and pattern but you can use microsoft word also.  Make sure you print your design to the size you want the final project to be.  You can print out a few different sizes and compare which one looks the best before committing to one.
This is the design I chose for the front of my tee
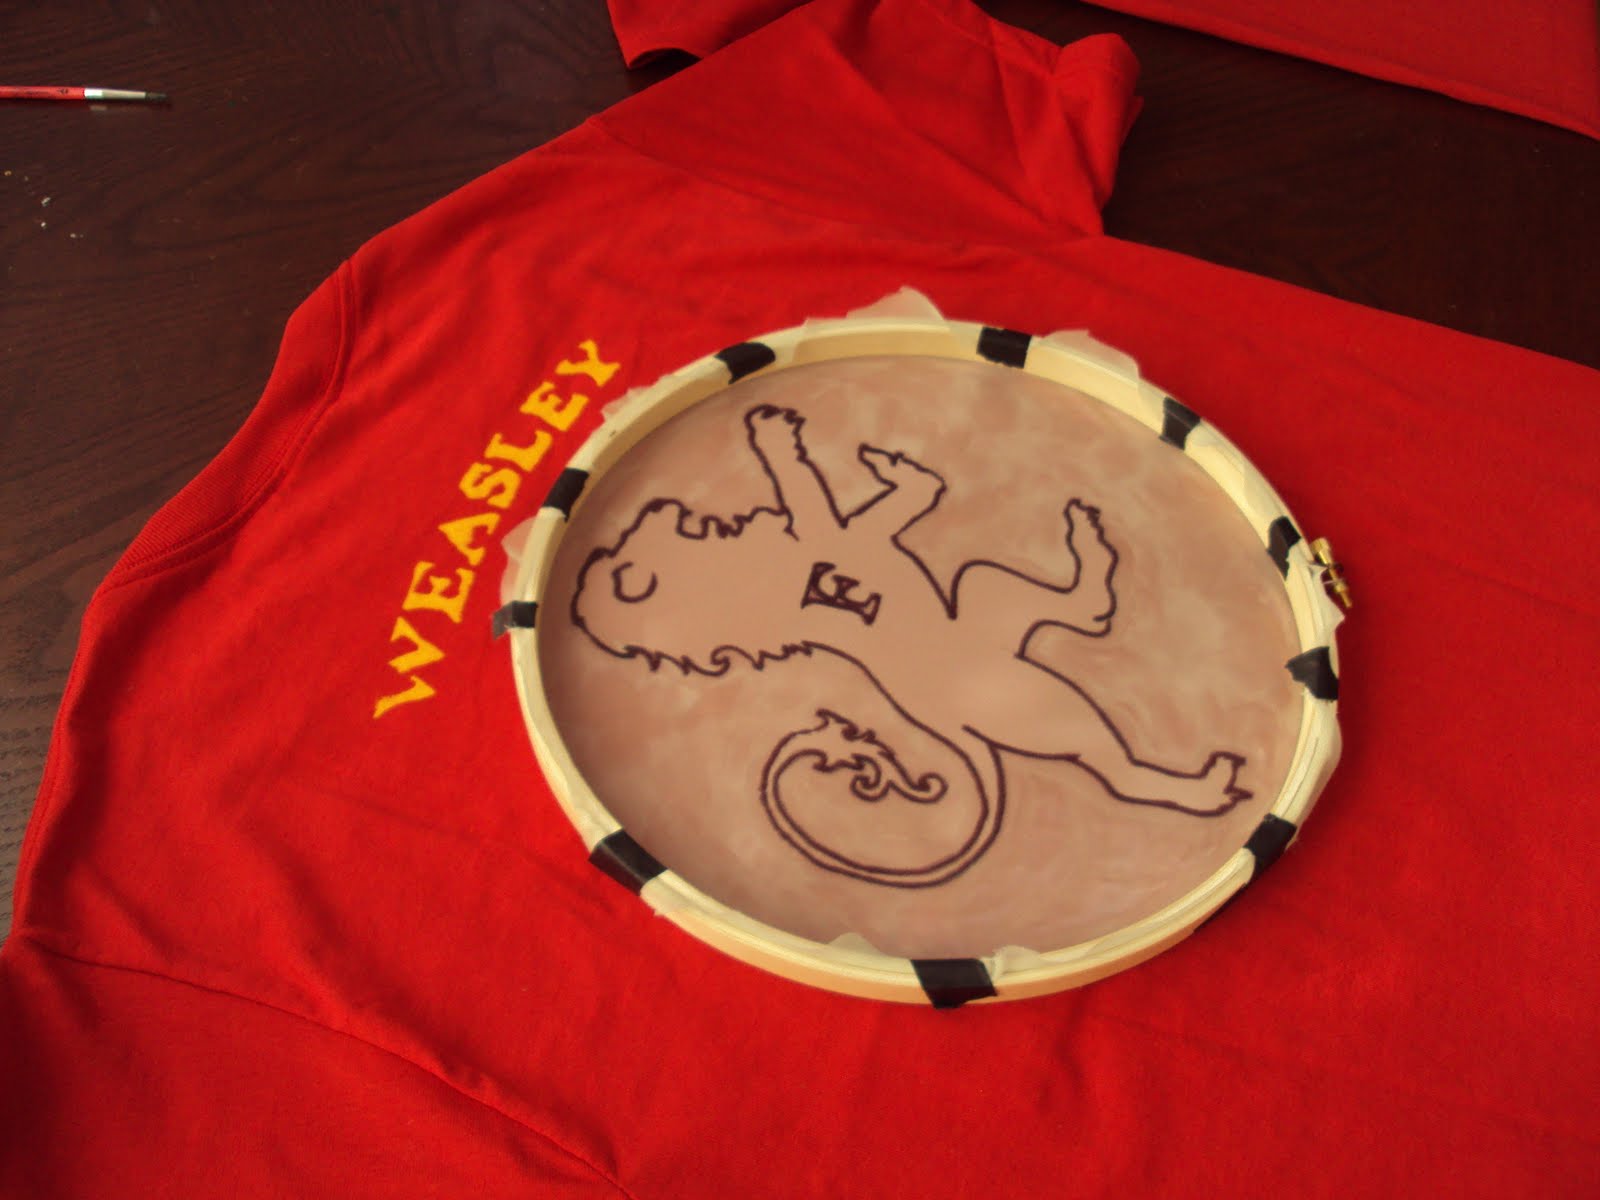
Step 5:
Trace your printed design onto your fabric hoop using a sharpie.  If your design is fairly large like mine is, you may need two different embroidery hoops to fit it nicely into the center of the hoop.  Below I am tracing part of the back design onto my fabric.
Tracing the back of my design
Step 6:
Flip your hoop over and use your paint brushes to fill in the areas that you DON"T want paint to seep through.  Make sure you know what part of the design will have paint and which one won't or else you might have to start over.  I used several sizes of paint brushes for this part.  The small ones were necessary to get into the small crevasses while the larger brush was used for painting a large area around the design.  For mine, the letters were going to be receiving the paint so I painted the area around them to keep paint out.  Make sure to cover more area around the design than you think you will need to.  Paint tends to spread farther than you think.  So play it safer than sorry here.  Once the glue dries, hold it up to the light and double check you didn't miss any spots.  Missing areas is easy to do and you can tell with my shirts that I didn't quite cover everything.

Flip the design over

Use modge podge to paint the areas that you do not want paint. 

Step 7:
Once the hoops dry (over night usually) arrange the first hoop onto your tee shirt.  Make sure it isn't crooked or off to one side.
Place hoop centered on top of the t-shirt
Step 8:
Add your fabric paint.  If you are afraid of it slipping out of place you can have someone hold it or place a few heavy books on the edges.  Once you have enough paint on, use your putty knife to scrape it along your design.  Scrap it back and forth and up and down making sure to hit every nook and cranny on your design.  The thicker the paint is applied the better it will look when you remove the hoop.  Once you have covered the whole area, carefully remove the hoop without bumping it.
Apply your paint

Scrape your paint onto your design

Once you remove the hoop let your paint completely dry before adding the second part of the design so the paint doesn't smudge.
Adding the second part of the design

The finished back side
Step 9:
Repeat the steps for the front of your shirt.
First part of the front design

Adding the second piece to the front design
If you find some of the design did not transfer onto your shirt like I did you can easily fix this.  Wait for the paint to dry and wash out your hoop with warm water.  Once the shirt and the hoop is totally dry, put the hoop back onto your shirt, line it up with the area you already painted and then add a second coat of paint and really work the paint into the area without moving the hoop around.
Missing parts of the design

Close up of missing paint

Design after I added a second coat of paint with the hoop

Step 10:
Once the paint has dried on both the front and back of the shirt you will need to heat set the paint.  To do this turn it inside out and use an iron on a dry setting.  The shirt will pucker where the paint is on the opposite side.  Then once you have ironed both sides, throw the shirt into the dryer for 20 mins.  And then your done.
Iron the shirt inside out to heat set the design


The shirt should pucker where the paint is

That's it!  It can be a little time consuming but well worth the wait for your own custom tee shirt.  Below is the back of our Fred and George Quidditch shirts.  The next blog I post should be Friday after the premier of Harry Potter with loads of photos of every one's costumes.

The finished front of both shirts

The finished product.  The back sides of the F and G lions

July 08, 2011

Count down to Harry Potter and the Deathly Hallows Part 2

Its T-Minus 6 days and 5 hours until the final Harry Potter movie comes out.  If you didn't guess it by now, I am a HUGE Harry Potter fan. I'm such a big fan that for my birthday last November I threw a Harry Potter themed party complete with costumes, decorations, invitations and treats.  Here are some photos of last fall's event.

 I hand painted these Hogwarts House Banners then sewed them on to coordinating fabric.  I hung these in the living room to serve as a background for group photos.

 The Leaky Cauldron provided the beverages for the evening.  They served Butter Beer, Witch's Brew and Swamp Punch.  The Butter Beer was terrific.  It has become my favorite holiday drink.


 The gang: an owl, Mickey Mouse from Fantasia (another great wizard), Hagrid and his dragon Norbert, the Weasley twins and Hogwarts students.

 Fred, George and Ron Weasley

My bosses even showed up dressed as Muggles.

 I paper mached a sorting hat

 I also made house badges guests drew from the sorting hat just like in the books.

 I filled the house with Harry Potter posters.  This one I made simply by printing out the photos online and gluing them onto a scroll background I found at Staples.

If you want to see the rest of the photos from the party and make your own Harry Potter treats, check out my Blog archive from November 2010.  There are three different posts to look at.

 I am so excited to see the final film.  I have my ticket reserved to watch it opening night with my fellow Harry Potter fans.  I am in the middle of getting my costume together for the event.  Brandy and I are going to be the Weasley twins again.  Once I'm finished I will post my creation asap.  Below is a photo of Megan and I at the Half Blood Prince premiere in 2009.  She was Bellatrix LeStrange and I was professor Trelawny.  We even had wands made with real unicorn hair.

Standing in line for Harry Potter and the Half Blood Prince

CHEERS!

July 03, 2011

Recipe: Martha Stewart's Firework Cookies

If you've perused the magazine collections while at a check out line in a grocery store this past month you may have noticed some red and white and blue star burst cookies on the cover of the July issue of Martha Stewart magazine. 


Pretty awesome pinwheel cookies right?  After seeing these, I just had to make them.  Usually I'm not that into holidays outside of November/December but this year I decided I wanted to go all out for 4th of July and make some Patriotic cookies!  So here's what happened:

I was off to a good start until 5 mins into making my cookie dough when I dropped an entire eggshell into the mixer while it was on high.  I thought about leaving them in there, but then I decided no one at the picnic tomorrow would want to eat crunchy cookies.  I had to take out all my dough and dig through to make sure I didn't leave any pieces behind. 

After that little incident it was smooth sailing until I got to the part of making the icing.  The recipe called for meringue powder which I hadn't even heard of until reading the ingredients list.  I followed the icing instructions pretty well I thought.  I mixed it until it looked like Elmer's glue, just like the recipe said.  Then I added my different colors and spread them on the cookies just like Martha (so I thought).  After I finished decorating all my cookies they slowly started melting to one side and dribbling off the cookie edges, taking my pinwheel patterns with them.  So now I am left with sad little cookies look like they were left in the sun too long. 


I'm not sure where I went wrong.  Maybe my cookies weren't cool enough or maybe I should have mixed the icing longer or maybe I didn't add enough powdered sugar.  Either way, it was fun to make them and I am still excited to show them off tomorrow.  I also have festively dyed red and blue palms to match my outfit tomorrow!

The cookies shown below are the best ones of the batch.  The firework didn't totally slide off the cookie yet.  I had extra icing left over and added solid colors to half my cookies and topped them off with sprinkles.  You can't mess sprinkles up...right?
Related Posts Plugin for WordPress, Blogger...